

Are you looking for options to fix Windows 10 Storage Sense Not Available or Disabled? If yes, then you have landed in the right spot.
Windows 10 has the tendency to just keep old temporary files. In fact, most of these files are not for any practical purpose or use. These files tend to occupy your storage space and nothing more than that. Having to delete them manually may be a difficult task, especially for non-technical users. This is precisely where a new feature in Windows 10 comes to your rescue. Yes, we are talking about Storage Sense.
There are times where you would find the Storage Sense feature not being available on your Windows 10 device or may be disabled automatically. How would you be able to resolve the issue and resolve the Windows 10 storage sense not available error message? The tips here should ideally be quite helpful.
What is Storage Sense?
Before we can move ahead to understand how to fix Windows 10 Storage Sense no available on your computer, let us first understand the feature and what it does.
- Storage Sense is a unique feature introduced into Windows 10. It is an excellent option for removing the old and unused files on your Windows 10 computer. The application continuously monitors your computer to find the old and unused files on your Windows 10 device. Based on how the data are used, it removes them automatically. To put it in simple words, you do not need to clear off the files in your recycle bin manually anymore. Storage Sense takes care of these files and removes them regularly.
Apart from the Recycle Bin, the Storage Sense functionality also takes care of the old and unused files inside your Downloads folder as well. As you might have already understood, the Storage Sense functionality is designed by merging the Disk Cleanup feature along with the Delete Temporary files feature to turn the task of removing your unused and temporary files a breeze.
How to enable Storage Sense?
Storage Sense may or may not be enabled by default on your Windows 10 device. However, configuring it should be an easy task as such.
Follow the steps here below to configure your Storage Sense functionality –
- Launch Settings and move to System
- Next, click on You may also reach the storage option by typing in Storage at the Windows Search.
- Once inside Storage option, locate and turn on Storage Sense.
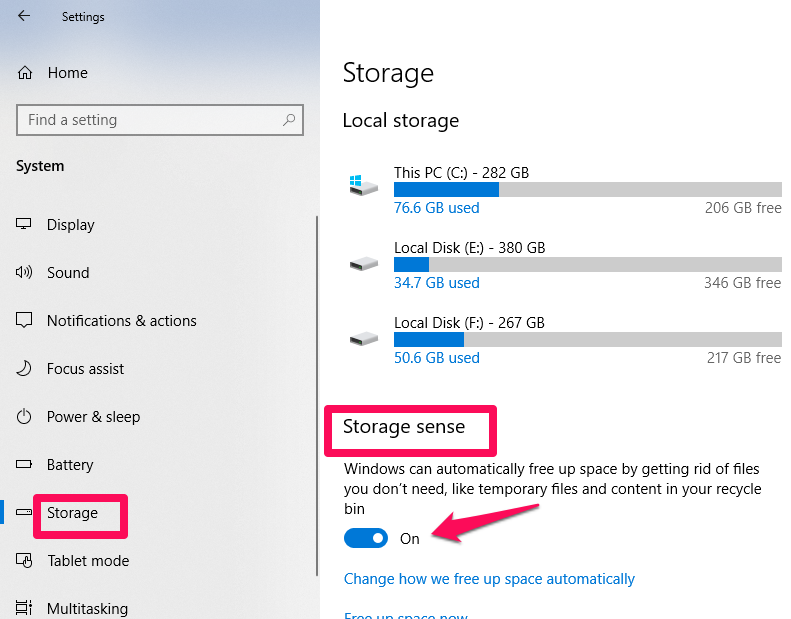

- Do note that the feature will handle the temporary files and the deleted files in the recycle bin. If you are looking for the additional folders to be included inside the Storage Sense ambit, the feature lets configure your preferences.
To include additional folders and other sections of your storage to the Storage Sense feature, you can use the following steps to add other folders as well.
- Once on the Storage option under the Settings menu, click on change how we free up space automatically
- You can perform your preferred changes for the efficient and desired to work of Storage Sense functionality
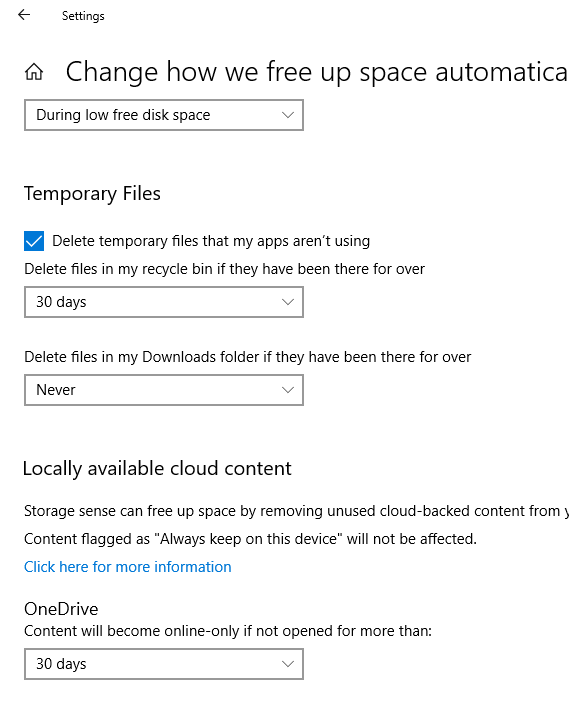

You can include Downloads folder and One Drive storage options as well from your computer after a specified time frame.
What if your Storage Sense is Not Available?
If you have already updated to the latest software version, you should find the Storage Sense option on your Windows 10 device. If you are unable to locate it for any reason, you may need to update your Windows 10 operating system to the latest available version.
To do this, head over to Settings -> Update and Security and check for new updates available for your computer. If there are any patches and updates are available, make sure you have updated them right away.
Ideally, we have not come across a situation where the Storage Sense option is not available on the Windows 10 computer. You may need to contact the manufacturer if you are running an OEM version of the operating system and the Storage Sense option is not available on your device.
Make Storage Sense run automatically using Group Policy
The Group Policy can be an excellent option to help you ensure that your Storage Sense compatibility is intact and works efficiently. You can edit the group policy through the use of Group Policy Editor and ensure that your Storage Sense application is working effectively and does not get disabled.
However, it should also be noted that the Group Policy Editor is an option available only on the Windows 10 Pro, Enterprise and Education editions. If you are on Windows 10 Home, you will not be able to use those features as group Policy functionality is not available on the Windows 10 Home edition.
Here is how you would be able to use Group Policy Editor for enabling the automatic working of your Windows 10 Storage Sense functionality.
- Launch Windows Search and type in msc
- This should launch Windows 10 Group Policy Editor.
- Go to Computer Configuration Administrative Templates System Storage Sense.
- Enable the option Configure Storage Sense cadence by checking it.
- Under the option Run Storage Sense, you can choose any of your preferred options that would suit your needs. Your choices include every day, every week, every month, or even select any specific low storage disk scenarios.
That should do it. Save your Group Policy Editor and exit. You have now successfully configured the Storage Sense to run automatically on your Windows 10.
Sadly enough, you will not find the Group Policy Editor option available for you if you are running Windows 10 Home. The functionality is only available on the Windows 10 Pro, Enterprise and education editions. If you are running Windows 10 Home and looking to make Windows 10 Storage Sense option run automatically, you can check out the possibility of editing the registry.
While we would be checking out the possibility of editing the registry files to enable the automatic running of your Windows 10 Storage Sense functionality, let us warn you that editing registry entries are a risky affair. You may end up breaking some of the other functionality if you tend to do something wrong. Ensure that you take enough care while following the tutorial below.
Having warned you of the consequences of a wrong step, here is what you are expected to do with your registry editor –
- Launch Registry Editor
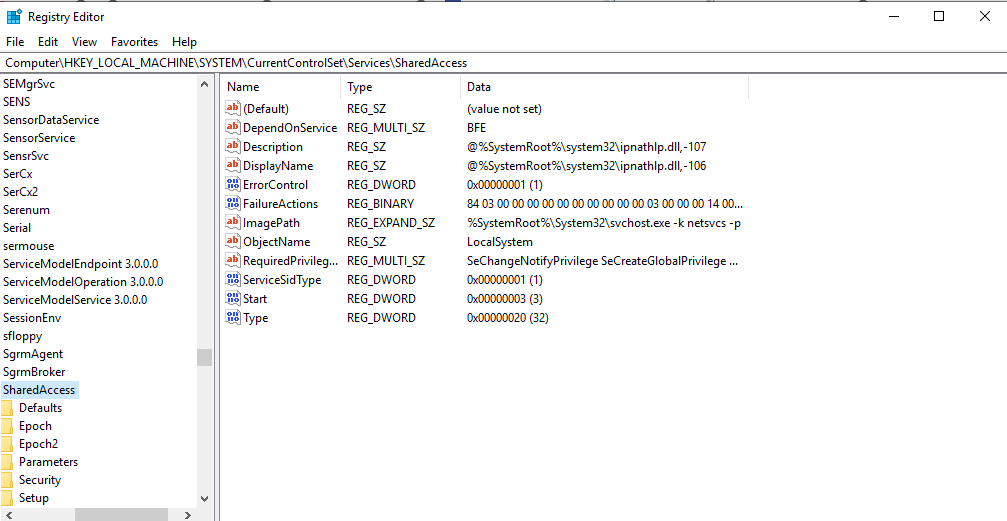

- Go to the registry entry – HKEY_LOCAL_MACHINESOFTWAREPoliciesMicrosoftWindowsStorageSense
- If you do not have the entry, you may need to create it.
- Now, inside the key, create a DWORD as shown here –
ConfigStorageSenseGlobalCadence
You will need to create a 32-bit DWORD here, not a 64 bit, even if you are running a 64 bit Windows version.
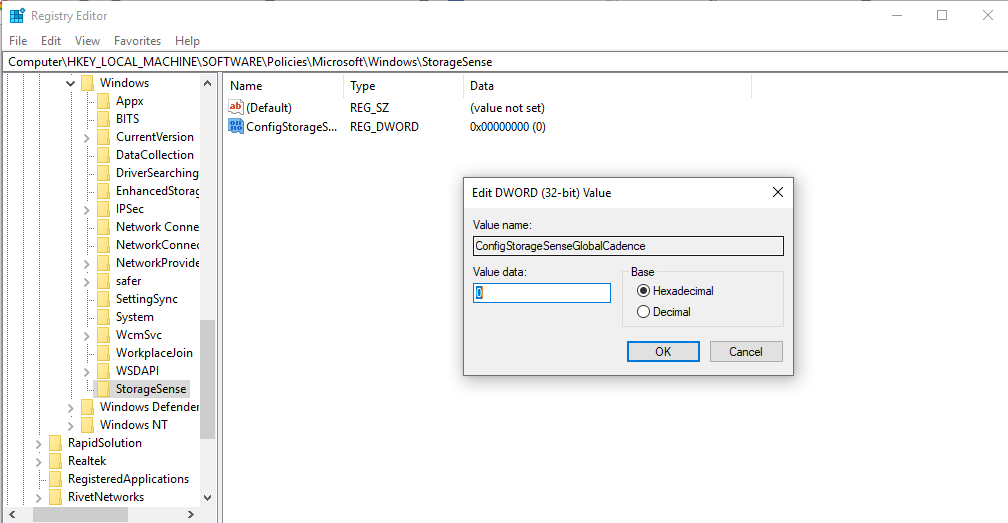

Choose the value as per your preferences. Here are the values you would set for the DWORD that you just created.
- 0- During low free disk space
- 1 – Every day
- 7 – Every week
- 30 – Every month
Once you have configured the settings, exit registry editor. Reboot your Windows device for the changes you made to take effect.
The Concluding Thoughts
That was how you would configure and fix the issue of your disabled StorageSense functionality on your Windows 10. In essence, if you have already updated your system and running the latest version of Windows 10, you should be able to make perfect use of the feature.
The tutorial here to “Fix Windows 10 Storage Sense Not Available” should help you get the best out of the StorageSense feature. Your comments and suggestions are welcome in the section down below. Thanks for visiting!